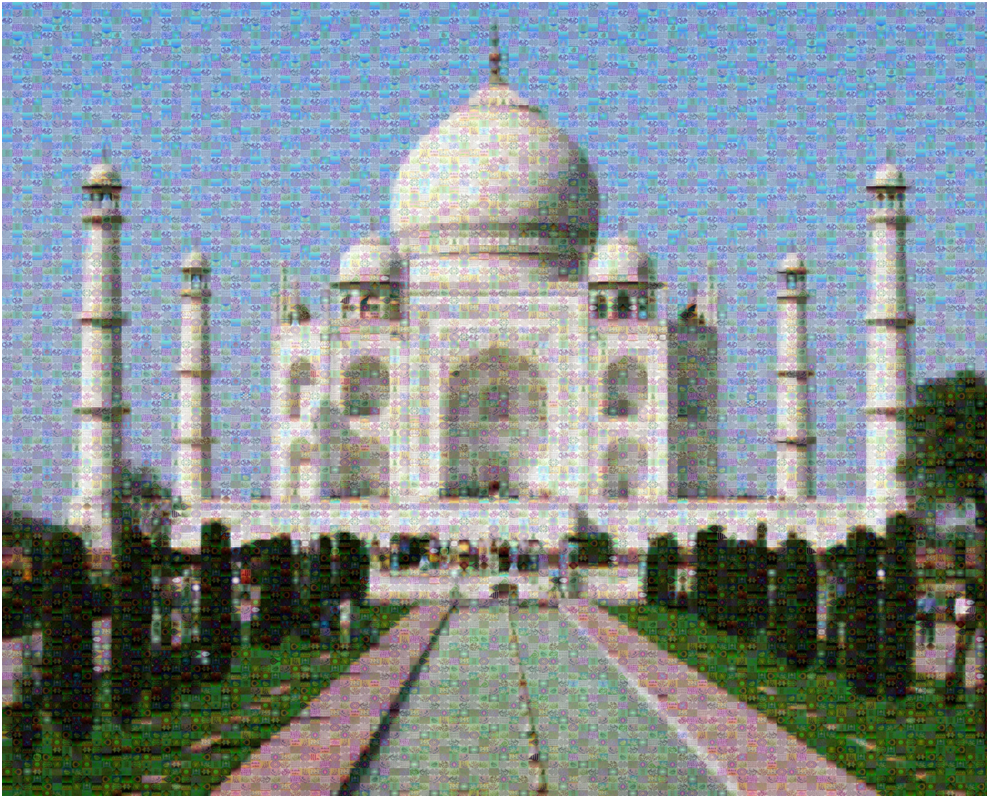
In this post, I will tell you how to type accented words (used in french, spanish) from your keyboard in linux. This is for the system using XKB (X KeyBoard extension) for key mapping. Almost all the system that uses xorg uses XKB. So, probably your system has a high likely hood of using XKB. To type the accented words like in french, a key called “compose key” must be set. Of course you have choice of setting any one key from the list of keys. For, example, to set the “left windows” key as the compose key, run the command,

 setxkbmap -option compose:lwin

here, on the above command, you are passing the option “compose:lwin” to setxkbmap command. As you must have guessed, “lwin” stands for left windows keys. You can also use ‘lalt’, ‘ralt’ for left and right alt keys. The list of keys you can use as compose keys can be found in “base.lst” file located in “/usr/share/X11/xkb/rules/base.lst”

You can view the contents of the file base.lst by running the command,

cat /usr/share/X11/xkb/rules/base.lst

it contains the list of compose keys.
Alternatively, to view only the compose keys from the file, you can pipe the output of the above command to grep with “compose” argument. So, to view only the compose keys that can be used, you can give the command,

cat /usr/share/X11/xkb/rules/base.lst | grep compose

The above command, lists only the line contains “compose” keyword.

Now, to set the compose key in your system, run,

setxkbmap -options compose:composekey

Here, replace the composekey with lwin/rwin/lalt/ralt or any other key that you may find in base.lst.

After setting up the compose key, now is the time to type the accented words.
For example, to type ‘é’ as in étudiant , first press the compose key, then ‘ (single quote) and then ‘e’ . So the combination is,
composekey + ” ‘ ” + “e” = é
Similarly for the alphabet ‘ç’ as in leçon, the combination is,
composekey + “,” + c = çand also, for ê – > composekey + “^” + e

Try experimenting the accented alphabets.

Note: This will work only for the current session. That is , when you log out and login again, you must again invoke the command “setxkbmap -options compose:lwin” to again make lwin as your compose key. To make it permanent (Well, not actually), put the above command in your .xinitrc file (before the exec command).

Here is the list of combinations of latin alphabets that you can type from your us keyboard : http://www.hermit.org/Linux/ComposeKeys.html

Sculptures of electronics are embedded into our lives(both known and unknown to us). Electronics has fascinated everyone; even the illiterate! Hobby electronics is a fun to some people (like me) and so much of them out there are still typing in Google “getting started in electronics”. So, below I produce a synopsis for giving a “kick” in hobby electronics.

What are the things you require?

-Interest
-Time
-Some money (Of course)

Hmm yes you read it correctly and there are only three requisites in getting started with electronics!

First comes interest. I hope that you have interest towards electronics, else you wouldn’t have came reading this far 🙂 . Never get discouraged when anything gets messy and gets spoiled. Always hope that you can fix anything that you’ve messed with. Playing with electrons is a fun and imagine that you are playing with an invisible partner! There are many definitions for electronics around the web. But the rule of thumb is that, in electronics, you instruct the electrons what to do and how to do…that’s it.. its very simple, is it not?

Of course, spare some time for it. Never try any project in a hurry and spend a ample time for your project to get it running. And money comes third. Nowadays, electronic components are cheaper that anyone can easily afford to buy the bare minimum things to get started! Alternative ways are simulating the circuits designed by you in any of the software available out there.

Getting started:

I know you are now asking where to get started.
Sincerely, you don’t need a much knowledge to become a hobbyist in electronics! Of course, the geniuses in electronics are once amateur hobbyists. Simply saying, all you have to do is try out lots of circuits out there. So, go ahead and get some working circuits. For example, http://www.circuitstoday.com here you will get enough circuits to get yourself started and moving. And also you can consider http://www.efymag.com. A simple trick is, when you search Google images for any circuit, it return s many versions of the circuits from many websites. Circuitstoday offers a excellent support in answering your queries. Get a simple circuit form these websites and list out the components needed, then go out and buy them in a radio house or electronics shop, and try out the circuits. Always it is better that you first try it on a solder-less breadboard. And if the circuit is really useful or you like it, then go ahead and solder it in a general purpose perforated board or a strip board. If you don’t like going out and buying components, there are many websites selling electronic components online. But you have to pay for the shipping too.

Then after trying some circuits and all those soldering stuff, try etching your own PCB. There are many tutorials online teaching how to make your own PCB,and making your own circuits… May be they wont work for the first time. But keep trying and join any forum such as edaboard or circuitstoday, people out there will help you build circuits. Then catchup with micro-controllers and advanced electronics. Good Luck!

Resources for basics and getting started:

http://www.ladyada.net
http://www.kpsec.freeuk.com
http://www.circuitstoday.com
http://www.efymag.com
http://www.circuitsdiy.com

Book: “Fundamentals of Electrical Engineering and Electronics” by B.L.Thereja
Book: “Practical Electronics for Inventors” by Paul Scherz
Online components store: http://www.probots.co.in
Online components store: http://www.onlinetps.com

Hai Fellas,

If you are reading this post, I assume that you are interested in robotics and eager to get started. If you think that this is a rubbish, then quit immediately.

You wanna build a line following robot (one of the basic robots to get started in robotics). A line follower follows a line with a contrasting background (like black line on white background). I assume that you posses the basic knowledge in electronics. Okay, let me put forward the parts needed to build your bot. In brief, you need a controller, IR sensors( to sense the line) ,an op-amp (nothing but a simple amplifier), a H-bridge motor driver (to provide high current to drive the motors) and of course, motors and wheels for locomotion.

There are three simple steps to build a line follower.

  1. Build the sensor circuits
  2. Amplify the sensor input and provide it to a pre-programmed controller
  3. Interface the controller with a H-bridge.

Block diagram of a line follower:


Here is the bot I built. Try it if you can (tested),

Parts needed:

  1. PIC16F84A (you can use any controller – provided you know how to program it) – 1no
  2. LM358N dual op-amp – 1no
  3. L293D H-bridge motor driver – 1no
  4. 7805 voltage regulator – 1no
  5. 4 or 10 or 20Mhz crystal oscillator for the controller – 1no
  6. 0.01uf ceramic condenser – 1no
  7. Resistors (4k7,1k,1k) – 1no(each)
  8. Preset 100k – 2
  9. LED – 2
  10. IR led (transparent) – 2
  11. IR receiver led (black) – 2
  12. 100 or 150 rpm geared dc motors – 2
  13. Wheels for the above motors – 2
  14. 1.5V AA battery – 8nos
  15. Solder less bread board (If you don’t like soldering)
  16. Any base (I took the package cover of my portable hard disk)

Here I used only two sensor. Being simple, a two sensor line follower cannot take acute turns and misses short turns.

Got the parts ready eh? Okay, let’s get started.

STEP1: Make the IR sensor modules (The eye of the robot). Cut a small piece of circuit board as shown in the figure below to mount the IR sensor module (IR transmitter and receiver pair – the transparent and black bulbs).

Follow the circuit below to make two of those.

STEP2: Now, make the Op-amp circuit (to amplify the signal from the IR sensor) according to the given circuit on the bread board

STEP3: Programming the microcontroller:

Now, this is the challenging part for the beginner. Here is the programmer for PIC16F84A by JDM. Solder the circuit on a blank circuit board and connect it to the serial port of your computer. It works pretty nice and is a really small circuit.. here take a look at it [which I made]

[Warning: Serial port is a must. USB to serial converters will not work.] If you want USB programmer, go and buy a MICROCHIP pickit 2 programmer which programs a wide range of PIC’s via USB.

Now, after building or buying the programmer, load the program into the controller. This is done using software like pony prog or IC prog. Here is the tutorial to how to program the PIC

Here is the ASM program for the basic line follower:

;****************************************
;
; Author    : Anish
; Controller: PIC16F84A
; Code for  : Line follower
;
;****************************************
;————————————————-+
;switch to register bank 1
;and set upper nibble of portB as input
;and lower nibble of portB as output
;————————————————+

bsf status,5
movlw B’11110000′
movwf TRISB
bcf status,5

;———————————————–+
;set RB0 and RB2 (motor forward)
;and continously check if RB5 or RB4
;is set.
;If RB5 is set, call the right flag
;If RB4 is set, call the left flag
;———————————————–+

start movlw B’00000101′
movwf PORTB
btfsc PORTB,5
call right
btfsc PORTB,4
call left
goto start
end

;———————————————–+
;If RB4 is set, set RB0 and RB3
;Break out of the loop if RB4 is reset
;else loop till RB4 is reset
;———————————————–+

left
movlw B’00001001′
movwf PORTB
btfsc PORTB,4
goto left
return

;———————————————–+
;If RB5 is set, set RB1 and RB2
;Break out of the loop if RB5 is reset
;else loop till RB5 is reset
;———————————————–+

right
movlw B’00000110′
movwf PORTB
btfsc PORTB,5
goto right
return

If you are not sure about compiling an ASM code, then here I provide the ready to go hex code. Just copy paste this below code on to a notepad and save it with a .hex extension and that will do. While programming, select this .hex file and program the IC.

:100000008316F0308600831205308600861A102091
:10001000061A0B20042809308600061A0B2808004F
:0A00200006308600861A102808003A
:02400E00F13F80
:00000001FF

STEP4: Finished programming… Now, it’s time to assemble… Wire the PIC as shown in the schematic below on the bread board. You can replace the 7805 with a 5 volt battery. The reason I used the 7805 is, to take 5V necessary for other circuits from the 12V supply of the motor which reduces the extra 5v battery and added weight.

STEP5: Now, also fix and wire the L293D as shown below on the bread board [Motor driver IC is used because, the PIC controller cannot directly deliver the current needed by the motor to run].

Assemble the parts motor with wheels, bread board, the sensors on a base and there you go… Your line follower is ready… Here are some of the pictures of the line follower I made on the solder less bread board

Like some videos?

Watch the sensor in action:

Rules of Thumb:

  1. Never use PP3 battery for powering up the motors.
  2. Use geared dc motors of low RPM – 100rpm motors will do [This is because, when you use a high rpm geared motors or ordinary dc motors, the robot as it attains great speed while traversing a straight line will miss the turn ahead – hope you get it]
  3. Assemble and test the whole thing on a solderless breadboard before soldering it on a general purpose pcb
  4. While soldering the circuit, use IC base for all the IC’s so that they can be – taken out used for other purpose/replaced easily when damaged/protected from overheating during soldering process

Resources:

  1. Some basic electronics
  2. Basics of PIC programming
  3. Digit website

Credits to:

  1. Digit Magazine for getting me started
  2. JDM for that nice and easy programmer
  3. My dad for financing me.

Comment for any queries.. and I’ll keep the robot updated for better versions.

Next update will be the same robot with 3 IR sensors. A better follower

What is RAID:

RAID stands for Redundant Array of Independant Disks previously known to be Redundant Array of Inexpensive Disks. First to explain RAID – what is it and what is it used for, let me clear you what does physical and logical drives in a computer system means.

A physical drive signifies the hard disk inside the computer cabinet. The physical part of the computer. It may be one or two in number.i.e., the physical drive is the real one as you see it inside the computer as a part of it.

In contrast, a logical drive is that which is a virtual representation of your physical drive. It is the drive(s), as seen by the operating system of your computer system.

An example might clear the cloudy thoughts about the physical and logical stuff concerning drives. Consider an  example, of a laptop, it has only one hard disk inside it, but when you partition it, such as C:, D: etc., now, the original drive inside the laptop is the physical disk and the C:, D: are called logical disks. I mean if you have four partitions, and one hard disk, you have one physical disk, which is divided into four logical disk… Now i think it will be clear that the logical disk is nothing but the physical disk as seen by the operating system.

Comming to RAID, it is the technology used to deploy the hard disks for increased storage and or or redundancy. Here R signifies redundant which means backup or duplicating. Here in RAID, we use two or more physical drives, and use RAID configuration to make the operating system believe that there is only one hard disk.(i.e., logical drive) many configurations are available in RAID such as RAID 0, RAID 1, RAID 2, RAID 3, RAID 5 etc… let me introduce RAID 0 and RAID 1 which will suffice the basic knowledge to RAID.. if you want more info on RAID, head to wikipedia and google is also there to help you.

RAID 0:

In this configuration, two hard disks are used. Here, data is split and written on both harddisks simultaneously. i.e., for example, take a file, if it is split up into 4 parts A,B,C and D, A and C go on one hard disk and B and D go in other hard disk. As data is written paralley, great speed is achieved. If it is to be stored on a normal hard disk(written in serial fashion), the data takes 4 seconds to record( assuming that each part takes one second to be written[though its fairly a too large time]). But in RAID 0 configuration of two disks, it takes only 2 seconds.. wow, how fast!. The advantages are fast and inexpensive. But the disadvantages are its not reliable.. because, if one hard disk fails, then total data is useless and lost. RAID 0 is illustrated below.

RAID 1:

Here, same as RAID 0, two hard disks are used. But instead of splitting and recording the data, the same data is written twice in the two hard disks i.e., one hard disk is exact duplicate of the original one. This provides redundancy, i.e., when one hard disk fails, no data is lost and thus data saftey is provided. The advantages here is mainly redundancy.. it is safe i.e, you wont loose your data till atleat one of the hard disk is alive and runnig up fine. The main disadvantage is the very slow writing speed coz, the data is written two times,and also cost of the drive matters. The below pic gives a clear view of RAID 1 config

Playing with images has fascinated everyone from professional photographers to a noob.
Now I will share some of the stuff I know in creating a photographic mosaic images using software called Andrea Mosaic (thanks to the developer)

Features of Andrea Mosaic:
1. Flexible options
2. Great UI
3. Ease of use
4. Its free

Download it from here.

Now I will explain you to create a basic photographic mosaic in few easy steps…

Step 1:
Download and install the software from the above link provided.

Step 2:
Open Andrea Mosaic and the application window.
Every option is self explanatory when you move your cursor over it and wait like shown below.

Now pass your cursor on to everything to view detail of each of the options.

Step 3:
Time for some fun!!!
Now you have to select the tiles (small images used to make the big one) Click the “select tile” option button and it opens a tile select window, in that click the add folder window and select the folder containing images for your tiles…

And then,

And now add the folder containing the images(the smaller ones to incorporate into the bigger one).

Step 4:
Save the tile by clicking the “save archive” button, now your tile will be saved by default name or any name you choose. Saving the archive is similar to saving a playlist for media players.

Step 5:
Now add the original image to be processed by clicking the “+” symbol button at the top of the window space. After adding, the image appears in the workspace provided with some grid lines as shown below…

Step 6:
You are almost done!!
Now, you can customize the image appearance..
Set Size parameters and tile duplication options (options are self explanatory when cursor is moved over).
Here “tile size” determines how many tiles to fit in to the image… Don’t worry if you have less amount of tile images, you can select the duplicate option to duplicate and fit the tiles to the size which you specify.
Under “color change” option, you can set the percentage of the color to which the tile should change with respect to the image to be processed (i.e.), The more percentage you set, the more the tiles are converted to the color of the image to be processed, The less percentage you set, the more the originality of the tile is kept.
The tradeoff between low and high percentage is the tile clarity and the final image mosaic clarity respectively.
The tile variants option lets you modify the alignment and orientation of the tiles within the image to be processed.
Finally, the “mosaic information” lists the information and customization of the work ready to be processed.

Step 7:
Now click the “more options” button to open the extra options to adjust image quality, output file format, save locations, setting borders etcetera. You can modify any setting or simply leave it to the default setting.

Step 8:
Now click the create mosaic option and wait….
Blimey!!!!! The image is ready…

This image is set with A4 mosaic size with 10000 tiles and a color change of 70%

Note: 1. To process a image with the same tile, create at least 30 duplicates of the tile in a folder and save it as an archive.
2. Use only JPEG images

Comments are welcome….

[Credits to the developer of the software]

Survival of the "Bit"test

Posted: January 23, 2011 in Tech-Talk, torrents
Working of torrents explained

Unlike HTTP (Hyper Text Transfer Protocol) downloads, the torrent files are downloaded by a peer-to-peer file sharing network. You may came across the terms like leecher, seed, peer, tracker etcetera while dealing with torrents… You may wonder what the hell these terms mean[I did!!!]. There are many web resources explaining this in detail but not all of them are convenient for the master inside your cranium to understand…here I prepared my best to explain each term concerning torrents and how they work. Let us start…. (Assuming you know basic surfing stuff)

Our conventional downloads are by HTTP (Hyper Text Transfer Protocol) or FTP (File Transfer Protocol). Here there will be a central server from which a connection is established through a series of routers and switches by any shortest path algorithm. For example consider that you are downloading Google earth, your browser sends request to Google server located in the USA. The Google server responds by setting up connection to your computer and sends the file to your computer through the wireless and wired connection through routers and switches as said above…

Now let us tear into torrents to examine them…

First of all let us see what is peer-to-peer sharing… the method used to download torrent files. Peer-to-peer sharing connects your computer into a network of computers that are connected together and have the file (that you want) completely or a part of it. Now you become one of the computers in that network and can receive file from the computers in that network and other computers connecting to that network can also receive file from you if you have downloaded the file or a part of the file. Here I illustrate how peer-to-peer network looks like….


Now don’t confuse with the connections, but imagine how it is connected…. each and every computer is connected with every computer on the network that contains that file. Here each box represents a computer like yours. In this network each computer is called a peer, hence the name peer-to-peer.


Torrents use this kind of sharing technique to download files.. But how do they implement it… How do you get connected… Who connects and disconnects you from the network… read on…


When you download a torrent file from a torrent search engine or torrent server such as the pirate bay or isohunt, the torrent file(Remember!!!! A torrent file is different from the actual file you want to download. A torrent file is like the index of the actual file you want) is loaded in your torrent downloader program such as utorrent or bitlord. This torrent downloader sends request to the parent server from where the torrent is downloaded… for instance take the pirate bay. Now here thepiratebay server is called the TRACKER. This tracker does the job of finding the network of computers having the file completely or partly… and joins you into that network. The computer having the complete copy of the file you want is called a SEED. The other computers having parts of the file are called PEERS. The computer that disconnects from the network after downloading the file is called a LEECHER. The more the seeds, the faster the download of the file will be. Here the tracker(here thepiratebay.org) does a wonderful job of monitoring the peer-to-peer networks… There will be many such networks on the internet that are monitored by the tracker. The tracker keeps record of the computers on the network and works on the principle of tit for tat!!!!!. That is if you always download a file and never seed… i.e. you are a leecher, or you disconnect from the network after downloading the file and never make let other users to download it from you… the tracker reduces the speed of your download next time you download a file from the tracker.. The more you seed, the faster the downloads will be…


Hope this helps… There are many tweaks in the internet for speeding utorrent… but for me none of them worked… believe me… if you set your upload rate to 10kbps and seed some 4 to 5 files, you can easily get a download speed of 200kbps… for a basic broadband connection.

Here are some nice trackers…

isohunt.com

thepiratebay.org

lokitorrent.net

torrentreactor.com

kickasstorrents.com

btjunkie.com

Happy torrent downloads……….

HACKing for noobs

Posted: January 2, 2011 in hacking, Tech-Talk
What is hacking? answer in my perspective:

Everyone who is familiar with the internet would have come across the weird terms HACKER and HACKING.

By the way the term hacker is very much misunderstood by the human community…

In most of their minds, a hacker is a dark bad guy who would steal their passwords, rob their bank accounts or do any sort of displeasing activities to them via online.

The term “hacking” and “hacker” gained much importance among the Homo sapiens only during the computer era. Much of the folks were not aware even such kind of word exists till the computer age.

The literal meaning of the term Hacking goes as,

“Modifying any material from its original form to suit your needs or to please you”

Carefully note the last part of the above mentioned sentence “suit your needs” and “please you”, this confirms that hacking skills varies from individual to individual. It’s the outcome of the extraordinary intelligence and imagination power of humans which are not equally used by everyone.

Surprisingly, hacking has become one of the hottest topics in the world of international network of computers.

Hacking is good.

I am sure that the above lines may disturb some folks. Why the hell hacking is good when the hacker is intended to steal and rob off our accounts?

For the above question, the answer is indeed very simple… it’s all the intentions of our mind.

Those whose intentions are to destroy things with their knowledge were never termed as hackers. They themselves called them hackers and they were actually crackers disrespected by the hacker community.

Hacking is just an art. Using it for bad or good purpose depends on you. I indeed bet that hacking is responsible for the very survival of this modern technology we are enjoying today. Surprising? But this is a damn truth.

Since the term hacking and hackers were widespread as a loathly term, and it meant both good and bad fellows, nowadays, hacking is broadly classified into two divisions namely black hat and white hat hackers. Yes, you may have guessed. Black hat hackers are those men who use their knowledge for destruction, and on the contradiction, white hat hackers are the builders of today’s technology.

Another group has arisen called the grey hat hackers and their intentions are bit of both as stated above. Basically, a grey hat hacker enjoys breaking into a secure system without authorization with no intentions of bad idea, just to show that that any type of security can be breached.

Okay, by the way, I have come across many people who wonder what is hacking and how to hack. When they surf on that topic, most of them are misguided to cracking websites.

As mentioned above hacking is any sort of work that modifies the originality of a thing, a thing means, anything not particularly software. Many people thing that hacking is a term concerned with software.

This is an unacceptable statement. For example a simple hacking is just connecting a potentiometer ( a variable resistor)  to your headset by which you can control its volume. Here in the above example, it is assumed that volume control is not provided in the headset and that you are just “hacking” it by connecting a potentiometer to control the volume.

Here lies the answer to the previously mentioned question “How to hack?”

For this question, let us analyze the above example, just to connect the potentiometer to the headset for volume control, you have to know how to rip of the headset wire, where to connect the potentiometer and how to use the potentiometer (of course) and finally, what is a potentiometer.

Without knowing these details, you cannot modify or “hack” the headset for manual volume adjustment.

Now I think you must be clear about the term hacking. To begin hacking, you must first do the following steps whether it a hardware or software hacking,


  1. Determine the object which you are going to hack. In the above example it’s our headset.


  2. Determine your modification. In our example, we want to make arrangements for manual volume control.


  3. Study the object carefully and know its entire anatomy and working mechanism. In our example, it about knowing where to connect the potentiometer and working mechanism of the headset.


  4. Then apply your modification. In our example, it’s connecting the potentiometer.

From the above steps, it’s very obvious that for hacking, you must have a in-depth and vast knowledge about the thing you want to hack…

Considering this, you must be strong in electronics if you want to be a hardware hacker. And you must be strong in at least 3 programming languages if you want to become one of those weird software hackers.

And finally hats off those hackers such as Steven Paul Jobs, William Henry Gates, Paul Allen and Linus Torvalds, without whom we cannot imaging today’s technology.

So, if you want to hack, first consider learning some basics of the subject that interests you and then happy hacking.

Incredible India

Posted: August 7, 2010 in Beyond Tech

In Praise of India
30 Famous Quotations about India and Hinduism
 
1.      Will Durant, American historian: “India was the motherland of our race, and Sanskrit the mother of Europe’s languages: she was the mother of our philosophy; mother, through the Arabs, of much of our mathematics; mother, through the Buddha, of the ideals embodied in Christianity; mother, through the village community, of self-government and democracy. Mother India is in many ways the mother of us all”.
2.      Mark Twain, American author: “India is, the cradle of the human race, the birthplace of human speech, the mother of history, the grandmother of legend, and the great grand mother of tradition. our most valuable and most instructive materials in the history of man are treasured up in India only.”
3.      Albert Einstein, American scientist: “We owe a lot to the Indians, who taught us how to count, without which no worthwhile scientific discovery could have been made.”
4.      Max Mueller, German scholar: If I were asked under what sky the human mind has most fully developed some of its choicest gifts, has most deeply pondered on the greatest problems of life, and has found solutions, I should point to India.
5.      Romain Rolland, French scholar : “If there is one place on the face of earth where all the dreams of living men have found a home from the very earliest days when man began the dream of existence, it is India.”
6.      Henry David Thoreau, American Thinker & Author: Whenever I have read any part of the Vedas, I have felt that some unearthly and unknown light illuminated me. In the great teaching of the Vedas, there is no touch of sectarianism. It is of all ages, climbs, and nationalities and is the royal road for the attainment of the Great Knowledge. When I read it, I feel that I am under the spangled heavens of a summer night.
7.      R.W. Emerson, American Author: In the great books of India, an empire spoke to us, nothing small or unworthy, but large, serene, consistent, the voice of an old intelligence, which in another age and climate had pondered and thus disposed of the questions that exercise us.
8.      Hu Shih, former Ambassador of China to USA: “India conquered and dominated China culturally for 20 centuries without ever having to send a single soldier across her border.”
9.      Keith Bellows, National Geographic Society : “There are some parts of the world that, once visited, get into your heart and won’t go. For me, India is such a place. When I first visited, I was stunned by the richness of the land, by its lush beauty and exotic architecture, by its ability to overload the senses with the pure, concentrated intensity of its colors, smells, tastes, and sounds… I had been seeing the world in black & white and, when brought face-to-face with India, experienced everything re-rendered in brilliant technicolor.”
10.  A Rough Guide to India: “It is impossible not to be astonished by India. Nowhere on Earth does humanity present itself in such a dizzying, creative burst of cultures and religions, races and tongues. Enriched by successive waves of migration and marauders from distant lands, every one of them left an indelible imprint which was absorbed into the Indian way of life. Every aspect of the country presents itself on a massive, exaggerated scale, worthy in comparison only to the superlative mountains that overshadow it. It is this variety which provides a breathtaking ensemble for experiences that is uniquely Indian. Perhaps the only thing more difficult than to be indifferent to India would be to describe or understand India completely. There are perhaps very few nations in the world with the enormous variety that India has to offer. Modern day India represents the largest democracy in the world with a seamless picture of unity in diversity unparalleled anywhere else.”
11.  Mark Twain: “So far as I am able to judge, nothing has been left undone, either by man or nature, to make India the most extraordinary country that the sun visits on his rounds. Nothing seems to have been forgotten, nothing overlooked.”
12.  Will Durant, American Historian: “India will teach us the tolerance and gentleness of mature mind, understanding spirit and a unifying, pacifying love for all human beings.”
13.  William James, American Author: “From the Vedas we learn a practical art of surgery, medicine, music, house building under which mechanized art is included. They are encyclopedia of every aspect of life, culture, religion, science, ethics, law, cosmology and meteorology.”
14.  Max Muller, German Scholar: “There is no book in the world that is so thrilling, stirring and inspiring as the Upanishads.” (‘Sacred Books of the East’)
15.  Dr Arnold Toynbee, British Historian: “It is already becoming clear that a chapter which had a Western beginning will have to have an Indian ending if it is not to end in the self-destruction of the human race. At this supremely dangerous moment in history, the only way of salvation for mankind is the Indian way.”
16.  Sir William Jones, British Orientalist: “The Sanskrit language, whatever be its antiquity is of wonderful structure, more perfect than the Greek, more copious than the Latin and more exquisitely refined than either.”
17.  P. Johnstone: “Gravitation was known to the Hindus (Indians) before the birth of Newton. The system of blood circulation was discovered by them centuries before Harvey was heard of.”
18.  Emmelin Plunret: “They were very advanced Hindu astronomers in 6000 BC. Vedas contain an account of the dimension of Earth, Sun, Moon, Planets and Galaxies.” (‘Calendars and Constellations’)
19.  Sylvia Levi: “She (India) has left indelible imprints on one fourth of the human race in the course of a long succession of centuries. She has the right to reclaim … her place amongst the great nations summarizing and symbolizing the spirit of humanity. From Persia to the Chinese sea, from the icy regions of Siberia to Islands of Java and Borneo, India has propagated her beliefs, her tales, and her civilization!”
20.  Schopenhauer: “Vedas are the most rewarding and the most elevating book which can be possible in the world.” (Works VI p.427)
21.  Mark Twain: “India has two million gods, and worships them all. In religion all other countries are paupers; India is the only millionaire.”
22.  Colonel James Todd: “Where can we look for sages like those whose systems of philosophy were prototypes of those of Greece: to whose works Plato, Thales and Pythagorus were disciples? Where do I find astronomers whose knowledge of planetary systems yet excites wonder in Europe as well as the architects and sculptors whose works claim our admiration, and the musicians who could make the mind oscillate from joy to sorrow, from tears to smile with the change of modes and varied intonation?”
23.  Lancelot Hogben: “There has been no more revolutionary contribution than the one which the Hindus (Indians) made when they invented ZERO.” (‘Mathematics for the Millions’)
24.  Wheeler Wilcox: “India – The land of Vedas, the remarkable works contain not only religious ideas for a perfect life, but also facts which science has proved true. Electricity, radium, electronics, airship, all were known to the seers who founded the Vedas.”
25.  W. Heisenberg, German Physicist: “After the conversations about Indian philosophy, some of the ideas of Quantum Physics that had seemed so crazy suddenly made much more sense.”
26.  Sir W. Hunter, British Surgeon: “The surgery of the ancient Indian physicians was bold and skilful. A special branch of surgery was dedicated to rhinoplasty or operations for improving deformed ears, noses and forming new ones, which European surgeons have now borrowed.”
27.  Sir John Woodroffe: “An examination of Indian Vedic doctrines shows that it is in tune with the most advanced scientific and philosophical thought of the West.”
28.  B.G. Rele: “Our present knowledge of the nervous system fits in so accurately with the internal description of the human body given in the Vedas (5000 years ago). Then the question arises whether the Vedas are really religious books or books on anatomy of the nervous system and medicine.” (‘The Vedic Gods’)
29.  Adolf Seilachar & P.K. Bose, scientists: “One Billion-Year-Old fossil prove life began in India: AFP Washington reports in Science Magazine that German Scientist Adolf Seilachar and Indian Scientist P.K. Bose have unearthed fossil in Churhat a town in Madhya Pradesh, India which is 1.1 billion years old and has rolled back the evolutionary clock by more than 500 million years.”
30.  Will Durant, American Historian: “It is true that even across the Himalayan barrier India has sent to the west, such gifts as grammar and logic, philosophy and fables, hypnotism and chess, and above all numerals and the decimal system